Sunday 30 November 2014

My favourite Banana Bread recipe and what I do with it

Banana Bread is a comfort food of mine.  Moist, with not too much sweetness (not like cake).  However, it can still be a carb-avoider's enemy.  Unless . . . that's right . . . someone (ahem) alters the recipe in such a way as to make it an acceptable carb.

This is my go-to recipe and I change it up depending upon what I have available or what I'm in the mood for.

Protein Banana Bread

Makes 2 loaves

4 ripe bananas
1 can (540 ml/19 oz) white beans, drained and rinsed
1 1/2 cups Splenda (or white sugar)
1/2 cup olive oil
4 eggs
2 tbsp. vanilla extract

1 1/2 cups all-purpose flour
1 cup whole wheat flour
1/2 cup quick oats
2 tbsp. baking powder
1 tsp. baking soda
1/2 tsp. salt
1 tsp. cinnamon
1 cups chopped walnuts

Preheat oven to 350ºF.  Spray 2 loaf pans with Pam (or equivalent).

Blend all wet ingredients in a food processor.  Mix together all dry ingredients.  Add blended wet ingredients to dry, and stir until combined.

Pour into prepared pans and bake for around 50 minutes, or until toothpick inserted in centre comes out clean.

***************************

Now, like I said, I do change it up sometimes.  Today, for example, I had 2 ripe bananas.  So, I took out from the freezer my shredded pattypan squash, thawed it, and squeezed the excess liquid from it.

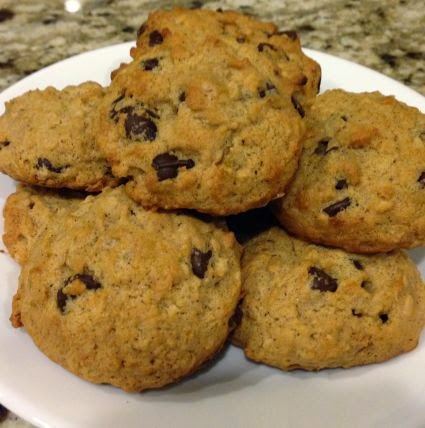
I also cut back the nuts a bit and added chocolate chips.

And, I added 1/2 tsp. dried orange zest, well, just because. (It ended up adding a brightness to the banana flavour.)

I made 1 dozen muffins (27 minutes in the oven) and 1 loaf.  As you can see in the picture, muffins are already missing.  LOL


Now, of course, due to the whole wheat flour and quick oats, these are a little more dense than some would like.  The flour/grain content can be adjusted to suit your own preference.  More all-purpose flour will make it fluffier.  Just keep the total grain content the same.


Sunday 23 November 2014

Pumpkin & Beet Green Scones

Oh my!  These are so light, fluffy, and melt in your mouth delicious!  This is a really nice, savoury scone.

I used my homemade canned pumpkin (1/2 jar, with the liquid squished out in a strainer) and my blanched beet greens that I had frozen. 


Pumpkin & Beet Green Scones

Makes 12 scones

3 oz. frozen, blanched chopped beet greens, thawed (or any green, like spinach, kale, etc.)
1 1/2 cups all-purpose flour
1/2 cup whole wheat flour
1/2 tsp salt
1 tsp baking soda
1/2 tsp baking powder
1 tbsp sugar
1/3 cup cold butter or margarine
1 egg
3/4 cup buttermilk (or 3/4 cup milk with 2 tsp. vinegar)
2/3 cup canned pumpkin or squash, drained
3/4 cup cheddar cheese, grated

Preheat oven to 375°F.

Mix the flour, salt, soda, baking powder and sugar together. Cut in the butter with a pastry blender or your fingers.  Blend in the grated cheese. Make a well.

In another bowl, beat the egg and buttermilk until well combined. Mix in the pumpkin and beet greens.

Add the liquid ingredients to the dry and mix lightly until just combined.

Drop by spoonfuls onto parchment-paper-covered baking sheet.

Bake about 20 minutes until lightly browned.

Canned Winter Squash

It's been a tad busy lately and I kept putting off the canning of some squashes I had got on sale. I had 5 acorn squash and 6 small pumpkins that were giving me the stink-eye every time I passed them so I eventually got to them last week.

I didn't take any pictures of the process but I still have 6 butternut squash to do, and the process is the same, so I'll make sure to take pictures when I can the butternuts.

I ended up with 9 500-ml jars of acorn squash and 18 500-ml jars of pumpkin.


And, of course, from from those squashes came a delicious by-product: roasted seeds (pumpkin in the background and acorn squash in the foreground).  I cleaned the seeds, patted them semi-dry in-between 2 tea towels, tossed them with salt and EVOO, and then roasted them at 400ºF for 15 minutes, stirring every 5 minutes.


Saturday 8 November 2014

Pureed Pumpkin

Halloween has come and gone, but the pumpkins remained.  After all the fun of carving them, it seemed a shame to toss them into the garbage.  I decided that this year I was going to use the pumpkins by freezing pumpkin puree for later use.  Edmonton's weather this year was perfect for storing the carved pumpkins in my unheated garage until I had time to deal with them.  It was just like a fridge. 

These lovely pumpkins ended up as 13 2-cup bags of puree and enough to make a batch of Pumpkin Oatmeal Chocolate Chip Cookies.


Now, I do have some small pumpkins that I'm going to can, along with some butternut squash, acorn squash, and sweet potatoes, but Halloween pumpkins aren't really very good to can.  They have a lot more water than the little pumpkins.  However, if you "de-water" the Halloween pumpkins, the puree is very tasty in a variety of sweet and savoury dishes.

(As a side note: If you carve your pumpkin early and it starts to look a little dried-out, soak it in a tub of water overnight and it will plump up again.)

"De-water?"  What is that?  All it means is to squeeze (or let drip) the excess water from the pumpkin after it is cooked. 

Well, with that said, this is what I did.  I carved up the pumpkins into wedges to roast (you could also steam them, too).  I didn't use much of the faces, though (other than to sneak up on my kids with this one in front of my face LOL)


I also used the smaller bits, too.


I roasted the pumpkin at 400ºF for 1 hour, covered.


I removed the rind after roasting, then squeezed the pulp in a cloth to remove the excess water.


I found the best way to puree the pumpkin was with an immersion blender.


That puree ended up mostly in my freezer in 2-cup amounts.


I did set some aside for some cookies, though.  I love these ones.  The pumpkin spice flavour isn't overpowering due to the oatmeal/chocolate flavour.


I also had some puree leftover to have with dinner.  I made a cheesy pumpkin rice by making a basic cheese sauce and adding the pureed pumpkin into it before adding it into some rice cooked in some of my homemade vegetable broth.  Delicious, smooth, creamy, and very filling as a side dish to tonight's grilled pork chops.

I think some nice, comforting pumpkin soup is in the near future, especially since we got a cold, wet snowfall today.


Sunday 28 September 2014

Chocolate Pecan Squash Cupcakes

Awhile back I came across a great deal on boxed cake mix.  My kids love cake, a mix is easy, and you can add stuff to it to make it taste a bit better.

This time, I used a mix to make naked cupcakes.  I don't really like to use icing too much.  The kids and Joel will put peanut butter, almond butter, chocolate cream cheese, etc. on the cupcakes, each to their individual taste (or nothing at all, too).

With the addition of shredded squash, the cupcakes come out very light and moist.


Chocolate Pecan Squash Cupcakes

Makes 24 cupcakes

1 box chocolate cake mix
3 eggs
1/2 cup oil
1 1/4 cups milk
1 cup chopped pecans
2 cups shredded summer squash (I used frozen shredded pattypan), squeezed to remove excess liquid

Preheat oven to 350ºF.

Line 24 muffin tins with paper liners.  Spray liners with Pam (or equivalent).

Mix the first 4 ingredients in a bowl with a hand mixer for a couple of minutes.  Add nuts and squash.  Mix until blended. Spoon into lined muffin tins.  Bake for approximately 20 minutes, or until toothpick inserted in centre comes out clean.  Remove from tins and let cool on rack.


Saturday 27 September 2014

Applesauce

A few apple trees, and 90 pounds of apples later, I have 38 jars of applesauce!


I make plain applesauce.  I don't add anything to it.  No cinnamon, no lemon juice, no sugar.  Nothing but apples and some water (or the pot will scorch).  I find plain applesauce more versatile.  I can always add flavourings if I need to and I can use this applesauce in other things without adding other flavours.  I also don't peel or core my apples.  I use a food mill to hold back the undesirable parts of the apple.

I start with quartering the apples into a large stock pot and adding about 1 litre of water.


I bring it up to a simmer over medium heat and then turn it down to low.  Any higher of a heat and you risk scorching the apples.  And, you cannot get that taste out.  Yuck.  After about 20-30 minutes, with some occasional stirring, the apples will be nice and mushy.


Off the heat and into the food mill.  As mentioned above, the food mill will keep behind any undesirable parts of the apples.  This is what's left behind:


And this is the yummy part:


What's really nice about using the food mill is the incredible lack of waste.  After 90 pounds of apples, I'm left with one bowlful of apple waste (about 10 pounds) and 38 jars of applesauce.


That's it.  The food mill is incredibly efficient and maximizes your output.  Pretty awesome, huh?

Oh, yeah, I processed the jars in a boiling water bath for 25 minutes because I'm at elevation (20 minutes if you aren't).


Saturday 13 September 2014

Apple Pie Filling and Canned Apples

Last week, I came across a great deal for apples so I bought 40 pounds, thinking I would make canned apple slices.  I want to do applesauce, too, but I'll picking those apples this week.

Anyway, I get down to business today.  Apple in the peeler contraption, place peeled apple on the cutting board, use another contraption to core and slice at the same time, apple slices into an anti-browning solution (3 Vitamin C tablets, ground, to 2 litres of water).  I'm motoring along, happy as a clam, quickly filling up a couple of large bowls with sliced apples.  Finally, I'm ready to put the slices into a boiling sugar water syrup (2:1 ratio water to sugar).  Into the pot they go.

If you have been following my blog lately, you'll have noticed that I prefer hot packing over raw pack.  I think the fruit comes out tasting better, plus you can fit a lot more fruit in a jar hot packed because the air void in the fruit get exhausted during the boiling.

Well, after a couple of minutes of boiling, I notice the apple slices feel a bit soft when I stir them with my spoon.  I didn't even get to the recommended 5 minutes.  It dawns on me that the reason I got a great deal on these apples is that must be from last year's crop.  Gah!

I figured that I'd finish one canner load (7 1-litre jars) and make apple pie filling with the rest. We're not big pie eaters, even though pie is awesome, but we do use pie filling in plain yogurt.

So, 40 pounds of apples eventually ended up as:
  • 7 1-litre jars of sliced apples
  • 7 1-litre jars of apple pie filling
  • 5 500-ml jars of filling
  • 1 250-ml jar of filling

One thing you may have noticed with this post is I didn't take more pictures.  Oops.  I forgot.    I was in such a zone today.  I was doing the stuff with the apples, I was baking bread, I was making dinner, washing dishes as I was going along, that I completely dropped the ball with the pictures.

We'll be apple picking on Monday, so when I make applesauce, I'll show you my apple contraptions.  Promise. 

Pear Syrup

Well, I finally got around to making the syrup from the pear scraps.


Just like with the peaches, I saved the pear peelings and cores, the anti-browning water, and the sugar water.  I put them all together into a big pot and simmered it for about an hour.


The first straining was to remove the peels and cores.


Followed by a finer straining to remove the pulp.


Into a nice big pot went the juice and sugar with a 2:1 ratio of juice to sugar.


After awhile, I had to transfer the syrup mixture to a smaller pot as my thermometer isn't long enough to reach the bottom of my large stock pot. However, I had to watch the mixture more closely in the smaller pot.  I had my syrup foam over once in the past and cleaning that mess on the stove-top was awful.


Finally, the syrup is ready.  You can really see the carmelization of the sugars.


Into some jars and a boiling water bath for processing.  I process for 10 minutes because I am at elevation but normal processing time would be 5 minutes.


Wednesday 10 September 2014

Pattypan Squash

Joel and I went to a U-Pick on Sunday and picked up about 25 pounds of pattypan squash. Isn't that word great? Pattypan. That's a fun word to say.   I tried to grow some this year, but I wasn't successful.  I kept getting lots of flowers, but nothing developed after that.  I think next year I'm going to have to try and hand-pollinate.


I chopped up the yellow ones, and the baby zucchini, into chunks.  I then blanched them in boiling water for 2 minutes, followed by plunging them into an ice bath.  After draining them really well, I froze them on a baking sheet, lined with parchment paper, and when they were frozen, I bagged them.


I shredded the white Pattypan squashes.  I did not blanch them.  I bagged them in 2-cup amounts and laid them flat on a baking sheet to freeze.


My sauces, stews, and baked goods just got healthier!


Saturday 6 September 2014

Canned Corn

Taber corn!  Yay! 

Joel went out early this morning and brought home a sack of Taber corn.  OMG!  It's so sweet you could eat it raw!

I reserved 6 cobs for tonight's dinner (Salmon Chowder in Bread Bowls), but the rest was for canning.


The twins helped me shuck the corn.  Look at all that sweetness!


I found a "food hack" awhile back, and I decided to try it out.  I must say it works like a charm.  Trim the corn from the top of the corn cob.


Then insert the trimmed end into the hole of a bundt cake pan, and continue cutting the corn off the cob.  It works very well.


Into a pot goes 1 litre of water and 3 litres of corn.


The corn is brought to a boil then packed into hot jars.  The jars were then pressure canned at 15 pounds pressure (because I'm at elevation) for 55 minutes (pints).

I ended up with 18 500-ml jars of canned corn.


I ended up with an extra 1 litre of corn so that went into the fridge for dinner later this week.  Well, except for this little bit.  This was my late lunch.  Yum!


I didn't throw out the cobs, though.  Those will be turned into a corn syrup.  However, that's another post.